
Last updated: May, 2025

This is the Webpack-based version of Part 3 of Modern JavaScript for Django Developers. You can find the updated Vite-based Part 3 here.
Welcome to Part 3!
In case you missed it—in Part 1 we covered how to organize a JavaScript codebase inside a Django project, and in Part 2 we provided a crash course in JavaScript tooling.
And now we finally start getting to the payoff: the nuts and bolts of integrating a modern JavaScript pipeline into our Django project.
In this part we'll finally stop with the theory, roll up our sleeves, and start getting building! By the end of this guide we'll have a React app and a Vue app running happily together in the same Django project.
In case not obvious—we don't actually recommend using React and Vue together in the same project. We just use this example because it helps demonstrate how the underlying pieces fit together and how they can be used to do whatever you want on the front end. Even using a framework at all is completely optional!
Sound fun? Let's get into it!
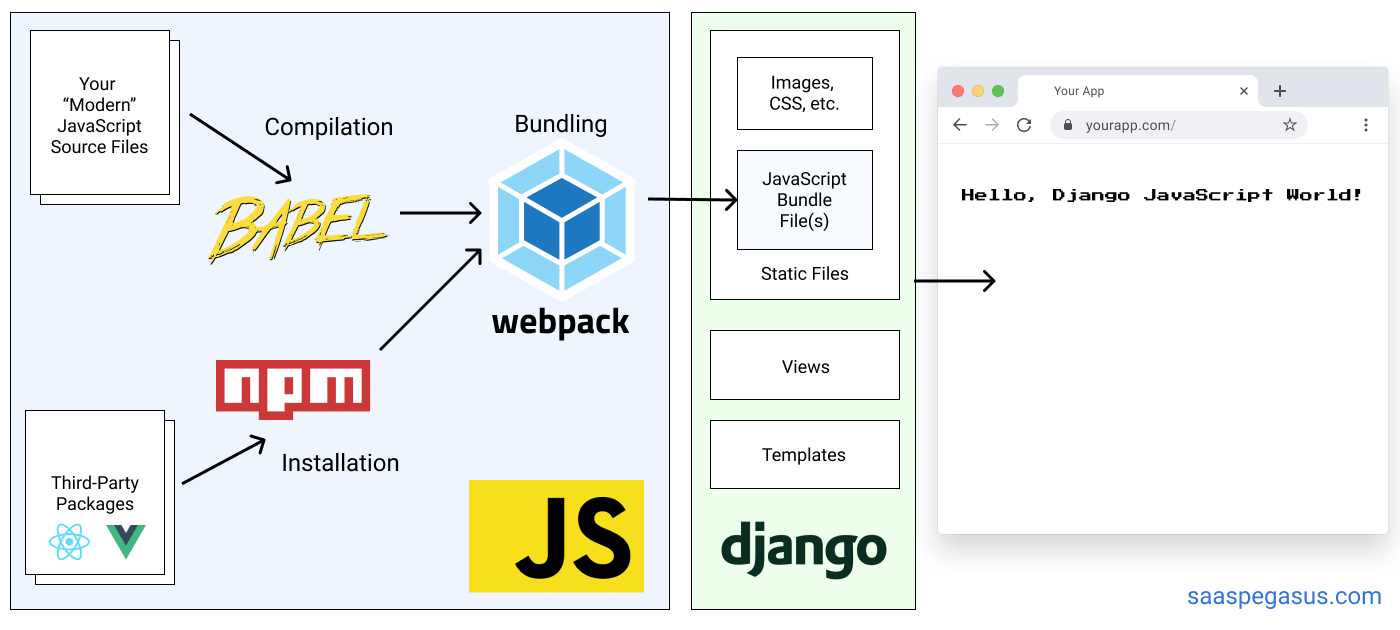
How JavaScript and Django will integrate
Let's start with the big picture setup.
Basically, we're going to create the JavaScript pipeline we covered in Part 2 as a standalone, separate environment inside our Django project.
Then to integrate with Django, the outputs (remember those bundle files?) will be static files that we'll drop into our templates wherever we need them. This will allow us to create anything from single-page apps, to reusable JavaScript libraries while maintaining the best of Django and JavaScript tooling.
Hopefully this makes sense, but if it doesn't, we'll get there through some concrete examples.
Laying out your project
Ok, first the basics: where to put stuff.
At a high level, we suggest making your JavaScript project a subfolder in the root of your larger Django project.
This guide uses a folder called ./assets/ for the front-end source files, though you could also use
./front-end/, ./js/ or whatever you want really.
The JavaScript project is where you'll do your front-end development—but remember Django will only work with the outputs
generated by the bundler.
So in addition to our ./assets/ directory, we'll also dump the outputs somewhere that Django's
static files system can find them.
A good default for this is an appropriately named root-level ./static/ folder.
Here's how that structure might look for a basic project modeled off the Django tutorial.
├── manage.py
├── mysite
│   ├── __init__.py
│   ├── settings.py
│   ├── urls.py
│   └── wsgi.py
├── myapp      <----- a normal Django app
│   ├── __init__.py
│   ├── models.py
│   ├── urls.py
│   └── views.py
├── assets     <----- our front-end project source
│   ├── javascript
│   └── styles
├── static     <----- our front-end project outputs (and other Django static files)
│   ├── css
│   ├── images
│   └── js
└── templates  <----- our Django template files
    └── myapp
Hopefully the above layout makes sense. One note about the above layout is that it puts all Django templates in a standalone folder, as recommended by Two Scoops of Django.
The main folders we'll be talking about for the purposes of this guide are assets and static.
Setting up webpack inside your Django project
In part 2 we covered how we'll use webpack to bundle up our JavaScript source files into a file we can use in our Django templates.
![]()
Now that we've got our project structure, we can set webpack up to do what we want—namely,
build the stuff in ./assets/ and drop the bundles into ./static/.
We'll cover how to create page-level bundles later, but for now let's just assume that we'll
bundle our entire front-end into one giant file called index-bundle.js.
To start, we'll be following along with the basics from the Webpack getting started guide.
If you haven't already, you'll need to install npm before continuing.
First initialize a new npm project in the root of your Django project and install webpack.
npm init -y
npm install webpack webpack-cli --save-dev
This will create package.json and package-lock.json files as well as a node_modules folder where our JavaScript
library dependencies will go.
The first two should be maintained by your version control system, while the latter should be ignored.
Next create a file called ./assets/index.js and give it these contents:
function component() {
  const element = document.createElement('div');
  element.innerHTML = 'Hello webpack';
  return element;
}
document.body.appendChild(component());
This will be our "hello world" set up to confirm that everything is working.
Our next step will be to create a webpack config file.
Create webpack.config.js in the root of your Django project, and give it these contents:
const path = require('path');

module.exports = {
  entry: './assets/index.js',  // path to our input file
  output: {
    filename: 'index-bundle.js',  // output bundle file name
    path: path.resolve(__dirname, './static'),  // path to our Django static directory
  },
};
Finally, we'll add an npm script target to run webpack.
In package.json add the following line to the scripts key:
  "scripts": {
    (other stuff here)
    "dev": "webpack --mode development --watch"
  },
Now we run npm run dev to execute our webpack script. If all goes well you should see an output like this
and your ./static/index-bundle.js file should be created!
$ npm run dev

> [email protected] dev /mysite
> webpack --mode development

Hash: c8fe6998ff64fdc5e0bb
Version: webpack 4.43.0
Time: 57ms
Built at: 06/24/2020 11:02:15 AM
          Asset      Size  Chunks             Chunk Names
index-bundle.js  3.96 KiB    main  [emitted]  main
Entrypoint main = index-bundle.js
[./assets/index.js] 171 bytes {main} [built]
Congrats! You now have a JavaScript pipeline!
Connecting your webpack bundles to Django
Now all that's left to do is to drop our bundle file in any Django template as a normal static file. This is all standard Django 101, but for completeness, let's show how that's done.
The basic template (let's call it hello_webpack.html) will look something like this:
{% load static %}
<!doctype html>
<html>
  <head>
    <title>Getting Started with Django and Webpack</title>
  </head>
  <body>
    <script src="{% static 'index-bundle.js' %}"></script>
  </body>
</html>
You can serve the the template by adding this to a urls.py file.
urlpatterns = [
  # other patterns here
  path('hello-webpack/', TemplateView.as_view(template_name='hello_webpack.html'))
]
This assumes hello_webpack.html is available from your template loader.
You may also need to make sure you're properly serving files out of the static directory by adding the following to settings.py:
STATICFILES_DIRS = [
    os.path.join(BASE_DIR, 'static'),
]
./static directory can be found by Django's static files engine.Once you've gotten everything properly set up, head to http://localhost:8000/hello-webpack/ and you should
see the very exciting "hello webpack" message from index.js.
Hooray! You now have a front-end pipeline embedded in your Django app!
Working with external JavaScript libraries using NPM
Ok, thus far we haven't actually done anything useful. So let's start exploring some of the benefits of having this front-end pipeline set up.
The first thing we might want to do is use a library.
Let's continue along with the webpack guide and use the lodash utility library in our index.js file.
To do this we'll first install it via npm:
npm install --save lodash
When installing a package that will be bundled into your production bundle, you should use npm install --save.
If you're installing a package for development purposes (e.g. a linter, testing libraries, or—in the case earlier above with webpack—a
bundler) then you should use npm install --save-dev.
This will determine where in your package.json file the library ends up,
and tooling will often remove development dependencies from final production builds.
Now we can update our index.js file to use lodash to generate our element:
import _ from 'lodash';

function component() {
  const element = document.createElement('div');
  element.innerHTML =  _.join(['Hello', 'lodash'], ' ');
  return element;
}
document.body.appendChild(component());
Run npm run dev again to regenerate the bundle file and reload the page.
If you did it right you should now see "Hello lodash" instead of "Hello webpack".
And we can now work with external JavaScript libraries! You can repeat this process for any other library you want to use.
Setting up React with Babel
Ok, so far so good. But we're still not doing anything really advanced—we're still basically using vanilla JavaScript and have just moved a few things around.
So now let's get fancy. Let's finally get that React app integrated into our project.
As we so lovingly alluded to in the introduction of this guide—React uses a language called JSX for its templating.
JSX is a language designed to let you easily use HTML in JavaScript code.
It's mostly like HTML but slightly different and more opinionated in ways that can be confusing
and frustrating when you first get started (for example, changing class to className everywhere).
Oh and it also lets you inject JavaScript into it.
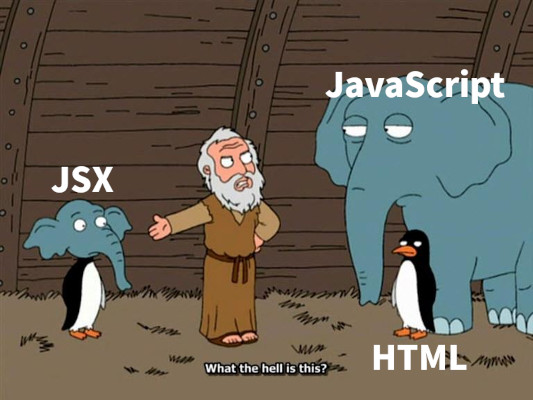
Anyway, the details of JSX aren't so important.
The important part is that browsers don't know how to speak JSX. So in order to use JSX in development you have to compile it into something that browsers understand. This is where Babel—our JavaScript compiler—finally enters the picture.
Babel can do all sorts of stuff (one of the best reasons to use it), but one of those things is parse JSX files.
It does this through a plugin ecosystem, and more specifically, through pre-configured setups—called presets—that work well for certain types of apps. Here we'll use the env-preset and react-preset, though presets also exist for TypeScript and other JavaScript flavors.
Anyway, those details aren't super important and it's not as complicated as it sounds!
The first thing we do is install Babel (@babel/core), its webpack loader babel-loader
and our two presets, all as development dependencies:
npm install --save-dev babel-loader @babel/core @babel/preset-env @babel/preset-react
While the main thing we wanted was preset-react, we're also bringing in preset-env, which allows you to use the latest JavaScript features without needing to worry about browser support. We recommend always using preset-env whenever you're using Babel—as it simplifies your life and prevents having to worry about the browser compatibility of various features.
Next we have to tell webpack to use this preset to process our files.
This is done via a loader.
We just need to add the following section to our webpack.config.js.
  module: {
    rules: [
      {
        test: /\.(js|jsx)$/,
        exclude: /node_modules/,
        loader: "babel-loader",
        options: { presets: ["@babel/preset-env", "@babel/preset-react"] }
      },
    ]
  }
In English the summary is: "use Babel's env and react presets to compile all .js and .jsx files that aren't inside the node_modules directory".
Ok, now we're ready to try our React hello world application.
First add the <div id="root" /> line to your Django template in the <body> (and before including the bundle file) like so:
  <!-- rest of file here -->
  <body>
    <div id="root" />
    <script src="{% static 'index-bundle.js' %}"></script>
  </body>
</html>
Next we need to install React and ReactDOM:
npm install --save react react-dom
Now we can update our index.js file to be a React version of hello world:
import React from 'react';
import ReactDOM from "react-dom";

ReactDOM.render(
  <h1>Hello, react!</h1>,
  document.getElementById('root')
);
Run npm run dev again and refresh your page. You should now hopefully see "Hello, react!".
Congratulations, you now have a hybrid Django-React application!
Setting up Vue.js with Babel
Ok, so you probably don't actually want to use both React and Vue in the same Django application, but let's say that for some reason you decide to.
Both projects are incredibly opinionated about the whole build pipeline thing, and so figuring out how to use them together can be a nightmare. But now that we've wrapped our heads around our modern JavaScript primitives this is actually an easy task!
Vue has it's own recommended file format—one that includes templates that look even more like html than JSX but still aren't quite the same, as well as some JavaScript and styles.
Here's Vue's Hello.vue example:
<template>
  <p>{{ greeting }} Vue!</p>
</template>

<script>
module.exports = {
  data: function() {
    return {
      greeting: "Hello"
    };
  }
};
</script>

<style scoped>
p {
  font-size: 2em;
  text-align: center;
}
</style>
Anyway, without getting into too much detail, the main point is that just like JSX, browsers have no idea what to do with this format. So like React, we have to pass it through a compiler.
Thankfully, this is as simple as installing Vue and a new compiler (in this case vue-loader)
and adding a new entry to our webpack.config.js.
  module: {
    rules: [
      {
        test: /\.vue$/,
        loader: 'vue-loader'
      },
      // the react entry we addded above goes here
    ]
Now we can add an index.vue file like the above, recompile our front end and voila! Hello Vue!
Try to set this up yourself following the React example and see if you can do it!
What's next?
We're done with tooling! However, this isn't the end of the guide.
What comes next is the fun part: we can finally get coding!
In Part 4 we're going to use practical examples to start building out real applications in our new architecture. We'll cover things like interacting with APIs, passing information between the back end and front end, creating reusable libraries, and more.
Read on in Part 4: How to build a React application in a Django project.